Here is a selection of Tips and Trick you can use on your PS3 to get the most out of your console.
Play games from any country
Unlike DVD’s which are region coded, you can play games from any country on your PS3. For example, if your on holiday on America or browsing Ebay and find the newest game for a fraction of the price in your country, BUY IT! Your PS3 will play it.
Enjoy!
Installing PS2 Emulator (Backwards Compatibility) A few problems
Firstly Install Linux OS (see below)
This is the PCSX2 emulator which was developed for Windows OS computers, however there is now a Linux version. The PS2 can have the Linux OS installing onto it’s hard drive (more info below). Installing the OS may take up to an hour.
When you Have Linux OS running smoothly on your PS3, your ready!
Download PCSC3 software from Google Code
Follow information from Google code to finish the installation
Blank Screen on new TV
Have you ever moved your PS3 to a new TV, maybe a non High Definition TV, and when you switch it on the screen remains blank?
This involves a simple trick to fix the issue, shut down your PS3 then restart by pressing and holding the power button. This will reset your PS3 to standard 480p graphics. The PS3 will then automatically detect would Resolution your TV can cope with and prompt you to change to the best settings.
Enjoy!
Control your PS3 blu-ray playback with iPod/iPhone
Now you can use your iPod touch or your iPhone as a remote control whhen your watching your latest blu-ray movie.
Best of all it’s FREE
Simply visit the Apple App Store
Search for BD Touch
Download BD Touch
All you need to do is make sure both your iPod/iPhone and your PS3 are on the same network.
Download game saves
Have you ever been stuck on a game, maybe you can’t beat a specific boss? Simply download the ’save data’ and copy to a USB memory stick. Then plug it into your PS3.
Go to the Game menu, choose your stick and the game save you downloaded. Press Triangle to copy it to your hard drive.
Download FREE game save here!
Enjoy!
Installing NES emulator
Now a note of disclaimer before we go any further, eCk PS3 Gamer do not condone software piracy of any kind no matter how old it is! In order to play games on the BD-J emulator you will need game roms. Playing Home brew roms should be fine but playing copyright commercial roms is illegal.
1) With that said, in order to get the emulator going you need a USB drive and download this application.
2) Extract the application to the root of the USB drive.
3) Place any roms into the the AVCHD folder on the USB stick.
4) Plug the USB drive into the PS3, and go to the video section of the XMB (cross media bar).
5) Go to the USB drive and play the AVCHD application.
6) A menu will appear where you can select from your list of roms.
That’s it!
We tested this using a free custom made homebrew rom and it worked like a charm. There seems to be some sound issue but I am sure future versions will have this fixed.
Enjoy!
Make free video phone calls
No more paying for calls!
You will need a headset (USB or Bluetooth) and an Eye Toy Camera. Connect both your headset and camera via USB or Bluetooth and go to your Friends menu. Select the friend you wish to chat to and press Triangle. Select Start Chat and type a message such as ‘video chat?’ for example. If they accept two windows will open showing you and your friend.
You can even add up to six friend in one chat by pressing Triangle and inviting more people to join.
Enjoy!
Stream Video to your PS3 to view in HD on your TV
Are you sick of watching video on your desktop PC or laptop?
Download ‘Vuze’ a cool program which let you download a wide range of HD video and Torrent Files.
www.vuze.comDownload a movie that you really want to see and get ready to view it in Stunning High Definition on your TV.
Make sure both your Computer and your PS3 are connected to the same router in your house.
Enable Devices in vuze (within the left side column) your PS3 will be automatically detected. Now drag your movie from the library to the PS3 option under Devices.
On your PS3, in Video Menu and select Vuze -> Movies -> Your download movie
Enjoy!
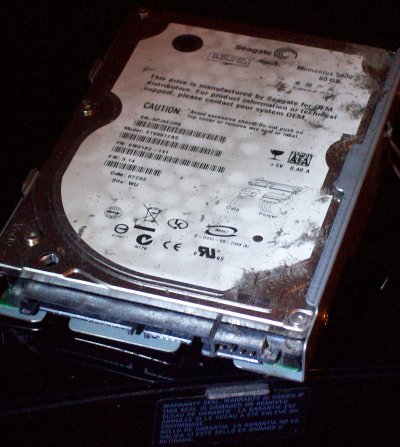
Upgrade your hard drive
PS3’s use a Seagate Momentus 5400rpm 40GB/60GB/80/GB 2.5inch SATA drive. Simply buy a Seagate Momentus 2.5inch SATA drive of your choice, 120GB or even more.
Remove the cover flap on the bottom of the PS3, undo the blue screw and the drive should slide out. Undo the four screws on the holder and remove the old drive. Put your new drive in and redo the four screws, slot it back in the PS3 and replace the blue screw along with the cover flap. Start your PS3, click ‘Yes’ to the message on screen.
Enjoy!
Share your bought downloads
You can download anything you’ve bought from the store to five PS3’s.
On your friends PS3 Create New User and log onto the store with your ID. You’ll now be able to go to your download and see that you’ve already downloaded whatever it was that you paid for. You can now download it again giving it to your mate for free. You could spit the cost of add ons such as Map Packs for Call of Duty!
Enjoy!
Force a PS3 to show your files
Put your photos in a folder called ‘PICTURE’ or your videos in a folder called ‘VIDEO’ or simply force your PS3 to look at your files on your stick regardless of what you called them or where you put them. Insert your stick and go to the menu option you want (Photos, Music, whatever). Press Triangle to bring up a menu and choose Display All.
This will show every file on the stick. It even works for a plugged-in iPod, though the multi-folder structure you’ll reveal is a bit baffling. Still, your songs are in there, if you’ve got the patience to find them.
Enjoy!
Install a Linux OS
Download Instructions (Windows)
Download Instructions (Mac)
The PS3 has a unique feature that allows you to install a third-party operating system on the console. Because of its popularity and ease of use, Ubuntu Linux is a good choice. By installing Ubuntu, your Playstation 3 becomes much more than just a game console. You can use it as a home computer (running desktop applications), a web- or file server, play media files, and run applications like Firefox, Openoffice and multimedia tools.
Installing Ubuntu on the PS3 will take about an hour. The process involves three steps:
Setting up your PS3 to run Linux
Installing your Ubuntu version of choice.
Setting up your PSUbuntu installation
Set up your PS3 to run Linux
You have to format your PS3 harddrive to install Ubuntu. You will probably want to backup your savegames! You will also need to let go of some 10GB of disk space.
What you need
An Ubuntu version for the PS3 burned on a CD. For information on how to burn iso files to a cd, see this page.
A USB keyboard and mouse. Wireless and bluetooth input devices should work fine (with a dongle).
A USB stick or external hard disk (if you want to backup files and saved games on your PS3).
Formatting the PS3 hard disk
The first thing you need to do is to format the PS3s hard disk to make room for a second operating system (called Other OS). Your user profiles and account information will remain on the XMB, but remember to back up any saved games or media files you want to restore after formatting the PS3 using a USB stick or an external hard disk. Your game saves are located under Game > Saved Data Utility.
All downloaded games you paid for can be downloaded again without having to pay for them. They’ll be in your account history in the PS Store.
Go to [System Settings] > [Format Utility].
Select “Format Hard Disk” and click [Yes].
Choose [Custom] and [Allot 10GB to the Other OS].
Select [Quick Format] and confirm with [Yes].
Formatting will take a few seconds. Press X to restart the system.
Log in (you need to hit the PS button on your controller if it’s deactivated after restart).
Installing Other OS
Installing the other OS is what it all about, You can choose the command line style loader included with the cd image you downloaded, but you can also download a custom loader called “petitboot”, I strongly recommend to use petitboot, as it makes it easier to switch between different resolutions or “kernels”.
You can find petitboot here
For Petitboot:
Download “otheros.bld”
Copy it to your usb stick or external harddrive in the folder; /PS3/otheros/
Connect your mouse and keyboard
stick it in your PS3
Go to [System Settings] > [Install Other OS].
Select “Other OS” and hit “Yes” to restart the system.
For the stock loader
Insert the disk you burned into the PS3. And connect the keyboard and mouse.
Go to [System Settings] > [Install Other OS].
Select “Other OS” and hit “Yes” to restart the system.
Updating your console
The last thing you will have to do is updating the PS3, I think you have done that before, but just in case you dont know:
Go to: [Settings > System Update > Update via Internet]
When there is an update available the PS3 will ask you to install it.
Installing (X)Ubuntu on your PS3
Note: There are more accurate guides avaliable for those who want to install 7.10 or 8.04. Following this guide will probably be fine, but for more details follow those link!
Now you’re done setting up your PS3 it’s time to actually install Ubuntu on your console! This chapter assumes you downloaded and burned a version of Ubuntu on a CD, so if you havn’t done that yet you should go back a little and follow the guide.
Start up the PS3s XMB (Cross Media Bar).
With the disk loaded, go to [Settings > System Settings > Default System].
Loading the installer
This is where the otheros.bld we downloaded and installed first show up, If you chose the stock loader (the otheros.bld included with the ubuntu installation) you will be greeted by two penguins and some lines of text. After a few seconds the terminal will display:
This is an Ubuntu installation CDROM
built on 20081030.
…
If in doubt, just press Enter.
kboot: _
Pressing Enter will start the installation with the kernel loading the system. Never mind the usb error message(s), just let the installer start up.
If you chose Petitboot you will see a nice little gui, You can switch menus (the icons on the left) by hovering over them with your mousepointer, It might take a minute before the CD icon shows up, when it does, click the icon and choose “install”
The option “gameboot” you saw when you first booted will take you back to the XMB, Stock loader users can type “ps3-boot-game-os” at “kboot: _” to go back to the XMB
Installing the base system
These instructions are only tested on a ps3 connected to the internet via cable. If you’re installing without internet access the process might vary somewhat from the steps below
First choose a language for the installation process, then your geographical location.
The system can try to determine your keyboard or you can choose it from a list.
The CD ROM is scanned, and additional components are loaded.
If your PS3 is connected to the internet via cable, choose eth0: Ethernet. Its better not to set up your wireless network here, unless you use WEP.
Enter a hostname for the system - like “psubuntu”.
Disks and hardware is dectected. If asked if you want to Activate Serial ATA RAID devices just chooseyes(anyone know why?).
When asked how to partition the disks, choose option 2: “Guided - use entire disk” (meaning the 10.7GB you formatted from the XMB in step 1?).
On the overview screen, hit “Finish partitioning and write changes to disk”. If asked to confirm, choose yes.
The partition is formatted and base system installed. It should take about 6 minutes.
Set up your user information (full name, username and password twice), and choose whether you would like to create a private encrypted directory for your user.
Unless you’re using a proxy, leave the HTTP proxy information field blank (just hit enter).
The system will start installing software. It might appear to hang at 6%, but just give the installer time and it will move on. The process will take about an hour.
System clock - Yes to UTC.
You’re done! The CD will automatically eject itself, but you have to manually take it out of its slot (if you don’t, the PS3 will load it upon reboot). Hit Continue to boot into Ubuntu.
Now its time to boot into Ubuntu, again, if you chose the stock loader press enter at “kboot”. Petitboot users now see a harddrive icon on the left, hovering the mouse over it will show the options you can set in kboot.conf, we’ll talk about that later on, for now select “linux”.
Once greeted by the Ubuntu login screen, enter the user name and password you chose during installation.
Congratulations! You should now have a working (X)Ubuntu Operating System installed on your Playstation 3. Move on to Setup PSUbuntu for tips on how to configure the screen resolution and making the OS run more smoothly


 by
by 


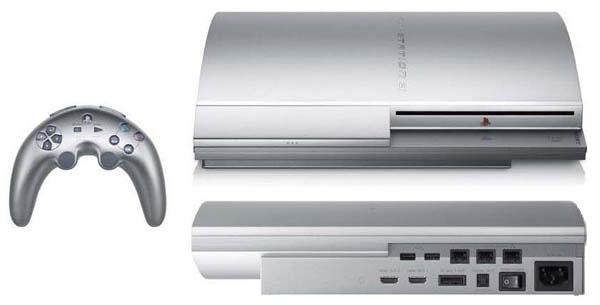
 i remember this silver ps3 as first prototype of ps3 with this sick controller hahahaha